This belt is the result of an experiment with 1.2mm. nylon micro cord. Knot definition is surprisingly good for such a soft cord. I would use it again.
Small Bellrope
A small bellrope for a small bell.
From the top:
8 strand MW.
8 point star knot .
Plain square knotting and two 5 part Spanish Ring knots.
Main body is "open diamond " pattern.
ABOK#3047 as grommet.
16 strand LLK.
The cord used is 2mm. polished hemp and micro paracord.
Labels:
Bellropes
Some Tips for Circular Knotboards
I have been asked several times about the method I use for making circular knotboards. It would take too long to do a tutorial for a complete board so I will just give the general method for one grommet.
This is a board I've already started but I'll just be describing the circular section in the centre. The board itself is finest grade 12mm. cork board and 6mm. MDF glued together. The cork board is too flexible on its own and so needs the MDF backing board to stiffen it. The cork side is the working surface. All construction lines are drawn before the intended shape of the board is cut out with the jigsaw. Find the centre of the board and drive a reasonably long panel pin straight through into the MDF backboard so that it is ROCK STEADY.
This shows a primitive beam compass made with a strip of hardboard which has small holes bored in it approximately 5mm. apart. An end hole must be large enough to fit over the head of the panel pin. I use a black Bic ballpoint pen for drawing the construction lines. Some supermarket own brand pens are not up to the job. Also, the holes must be just large enough to admit the tip of the ballpoint. If they are too large the tip may "wander" and you won't get perfect circles. Next, draw some equally spaced diameters. Here I have drawn 6 so that there are 12 radii (12x30'=360'). I use a 360' protractor for this. That is all the construction lines that are needed for a circular board.
The grommet to be shown will be a 4-part turks head ,doubled. Here I have made a short section of the associated sennit using the same size cord which will be used.The next thing to do is work out how many bights will be needed for the grommet. I have already made a start with this board so that what is to be shown will be a reasonable size for you to see what is going on. Each piece of work done is braced against the previous one so that it can be fully tightened. Pin a section of the sennit as shown . Here I have pinned across 4 sectors. There are approximately 10.5 bights between the pins. Multiplying by 3 gives the number of bights needed for the grommet which is 31 . Can't have 31.5 bights! The 4-part turks head can be made with any odd number of bights so 31 bights is good.
Here I've made a former for the grommet. I use 7cm. strips cut lengthwise from a thin yoga mat . The diameter of this former is the diameter of the whole work already done plus twice the width of the grommet to be made.
I use strips of graph paper gummed together to go around the former to aid in the pin placement and to provide a smooth surface. Measure the circumference in mm. from the graph paper and divide that number by 31 to give the distance between pins. The pin rows are in line for a turks head with an even number of parts. It is very rare to get a whole number when you do the division! For example, if you get a number, say, 10.25mm. then multiply this by 4 to give 41mm. You then find 4 numbers that add up to 41. Three 10's +11 =41. So you would place your pins in groups with distances between pins of 10mm.x3 and 11mm.
Make a dummy run of 1 circuit to find how much cord you will need for the job. Remove, measure and multiply by 8. You may wish to add a bit extra just in case! I will be using blue cord for the grommet the same size as the red sample.
Form the doubled 4-part turks head.
Remove all pins after having placed pins all the way round in the centre of the grommet as shown . This will keep the bights evenly spaced around the former and allow you to keep control. Remove the initial slack and you should get what is shown here.
Transfer the grommet to the board. There are 31 bights so pin at a diameter and count round 15.5 bights (half of 31) and pin again diametrically opposite (on the same diameter). In a similar manner pin at other points so that the bights are evenly distributed all the way round. If you don't do this you may find that when the grommet is fully tightened one or more sections may be tighter than other sections and it won't look uniform. Also, keep the grommet well pinned throughout from start to finish.
Initial slack removed.
Fully tightened. Remember to keep pinned throughout. In find that I only have to tighten twice. Once for the initial slack and once to fully tighten. Try not to tighten too much. Practice will tell.
Lift a small section at a time and apply glue. Don't remove the whole grommet from the board to glue all at once as, being under tension, it will contract and you may not get it back on. Also you will likely make a mess with glue. Once you've applied glue, pin that section back down. Use glue sparingly so that it doesn't soak through to the surface. Again, practice will tell how much to use.
Another section glued. I usually apply the glue and then spread it evenly with a toothpick.
All done! Fully glued and all pins removed. Wait until the glue has at least "grabbed" before removing the pins and trimming the ends. I hope you find this tutorial helpful. It is the general method and will apply to most other grommets. Remember to spread the bights evenly before tightening and glueing .
Good luck!
Joe Bennett
This is a former that I used for a previous board . It is 16 inches in diameter. In the centre is a golf cart wheel to give a bit of rigidity. Well, people shouldn't leave their golf carts unattended on the golf course! 🤭
Be prepared to use long lengths of cord and hundreds of pins for large boards.
This is the last board that I made.(only joking about stealing the golf cart wheel!)
PATTERNS in SPANISH HITCHING
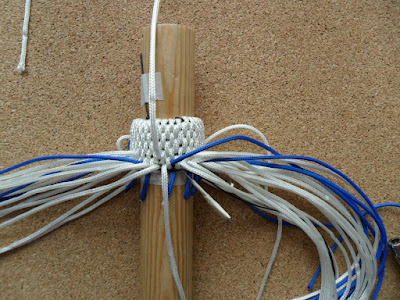
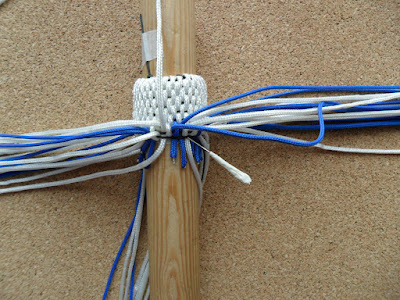
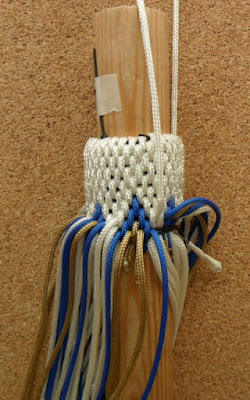
This tutorial is for a method of making patterns in Spanish Hitching. I produced something similar previously but this method is much better.
I will be using 1mm. black polyester cord for the warp and 2mm. white polyester for the background colour. I will use red, blue and gold type 1 paracord from Paracord EU/UK for the pattern.It is about 1.9mm. The photo shows the rig that I use. A lollipop stick with 2 small holes drilled in it is clamped to the edge of the table. A pin vise is the best tool for drilling the holes which should be just big enough to reeve the warp cord through. The warp is rove through the holes as shown and secured to the 28mm. piece of dowel that the work will be done on. I use black cord for the warp as it tends to get lost in shadow. When pulling slack through on the warp it should render freely through the holes with perhaps just a little bit of resistance.
This shows, once you have enough slack to work with, a clothes peg which is clamped to the end of the stick. This should be sufficient to keep the warp taut while you work.This is how I start. These white cords will be the background for the design. The warp must be kept taut as you insert them. Indeed, it must be kept taut at all times.All whites in place.
Add another turn of warp by rotating the dowel. The hitches for this system will be over 3 and back up under 1. The cord leading upwards is the first cord to be hitched as it is the first one to go over 3 parts of warp.It will also be the start of the first "row"
First row started with inside or left hitches (LH's).
First row finished because the next strand to be hitched (leading upwards} would only be going over 2 parts of warp.
This shows another part of warp wound on and the cord leading up is the first to be hitched for the next row.Next row started.
Row finished.
This is the pattern to be made. It has a pattern repeat every 4th hitch. There are 32 white cords in play and as 4 is a factor of 32 there will be 8 of these diamonds in the all-round pattern.
This is the start of a new row and the pattern will start here. Referring to the diagram, LH (left hitch) with white and bring blue up into play under the warp.
. RH the next 2 whites, drop(don't hitch) the next white and LH the next one. Starting with blue, the sequence is
lift blue into play-RH-RH-drop-LH.
Repeat all the way round.
This shows dropped strands leading upwards.
Row completed as the next strand to be hitched (leading down) is only going over 2 parts of warp.
Wind on another turn of warp bringing all dropped strands under it as you go. Notice that these strands will come down between an RH and a LH, splitting these two hitches.
Ready to start the next row . The strand leading up will be first to be hitched in the next row as it is the first to go over 3 parts of warp. As you work, avoid shear. The warp is always under tension and will tend to pull the work to the right. Make sure a completed hitch is directly beneath the one above and the vertical line of hitches above.
Referring to the diagram, the first hitch in the next row is a LH which is shown leading down.
From now on I will just describe the sequence for each row.The sequence is, starting with blue
LH blue
lift another blue up under the warp
RH white
drop white
LH white
Repeat to finish the row.
This shows the finished row. The next cord, leading up, would only go over 2 parts of warp so wind on another turn of warp and bring down all dropped strands under it.
This shows the first strand of the next row hitched . The diagram tells me it is a LH.
This is the sequence for the new row starting with blue
LH blue
lift gold into play
RH blue
RH white
drop white
Where you start the sequence will depend on which cord starts the new row.
To recap, the modus operandi is
start new row with the first strand that goes over 3 parts of warp
the row ends with the last strand to go over 3 parts of warp
wind on the extra turn of warp, placing all dropped strands under it between a RH and a LH.
The sequence for the next row is
LH blue
LH gold
lift new gold
RH blue
drop white
When first hitching a newly inserted cord, keep your thumb on the end in case you pull it out!! It will be completely stable doing the second hitch with that cord. If you do accidentally pull a cord out it can be reinserted using a thin paracord needle.
The sequence for the next row is
LH blue
LH gold
lift red
RH gold
drop blue
The sequence is
LH blue
lift another blue
RH gold
drop red
LH gold
This sequence is
RH blue
RH gold
drop gold
LH blue
lift white
If any previously dropped cord is lying fair and is the correct colour, it can be brought up as a newly inserted cord as I have done here with the white cord on the right in the first sequence. This saves introducing another cord.
The next sequence is
RH blue
drop gold
LH blue
LH white
lift another white
In any row, if a number of strands are dropped then the same number of strands are lifted and vice versa. In this work there are always 32 strands at the start of every row.
Here is the sequence for the next row
RH blue
drop blue
LH white
LH white
lift white
Complete the row, wind on the extra turn of warp placing dropped strands below it as you go.
Sequence for next row
drop blue
LH white
LH white
lift another white
RH white
Once you have completed the row and placed the final blues below the extra turn of warp, the design is finished. Only 32 white cords are left in play. The photo shows where I have started LH's with all the whites but you may use all RH's if you prefer. Nothing need be lifted or dropped. White is just background.
The finished sample after having rolled it with a flat piece of wood. Also, before hitching a cord, pull on it slightly to remove any slack that may have worked into the previous hitch. This will keep the hitching uniform and enhance the appearance of the work.
A more complex all round pattern.
This shows just some of the great variety of designs that can be produced.
That is the end of the tutorial. You may find it slow going to begin with but once you have understood how it is done, progress can be made at a reasonable rate. Try your own design!!
Labels:
Tutorial
Subscribe to:
Posts (Atom)


