
This is one of those knots that would be better shown face to face at the likes of the AGM but that can't be done at the moment. Anyway, I will do my best with it here. It is much more distinctive than ABOK#1387 and has a more pronounced triangular cross-section. It has two cycles, both of five parts.

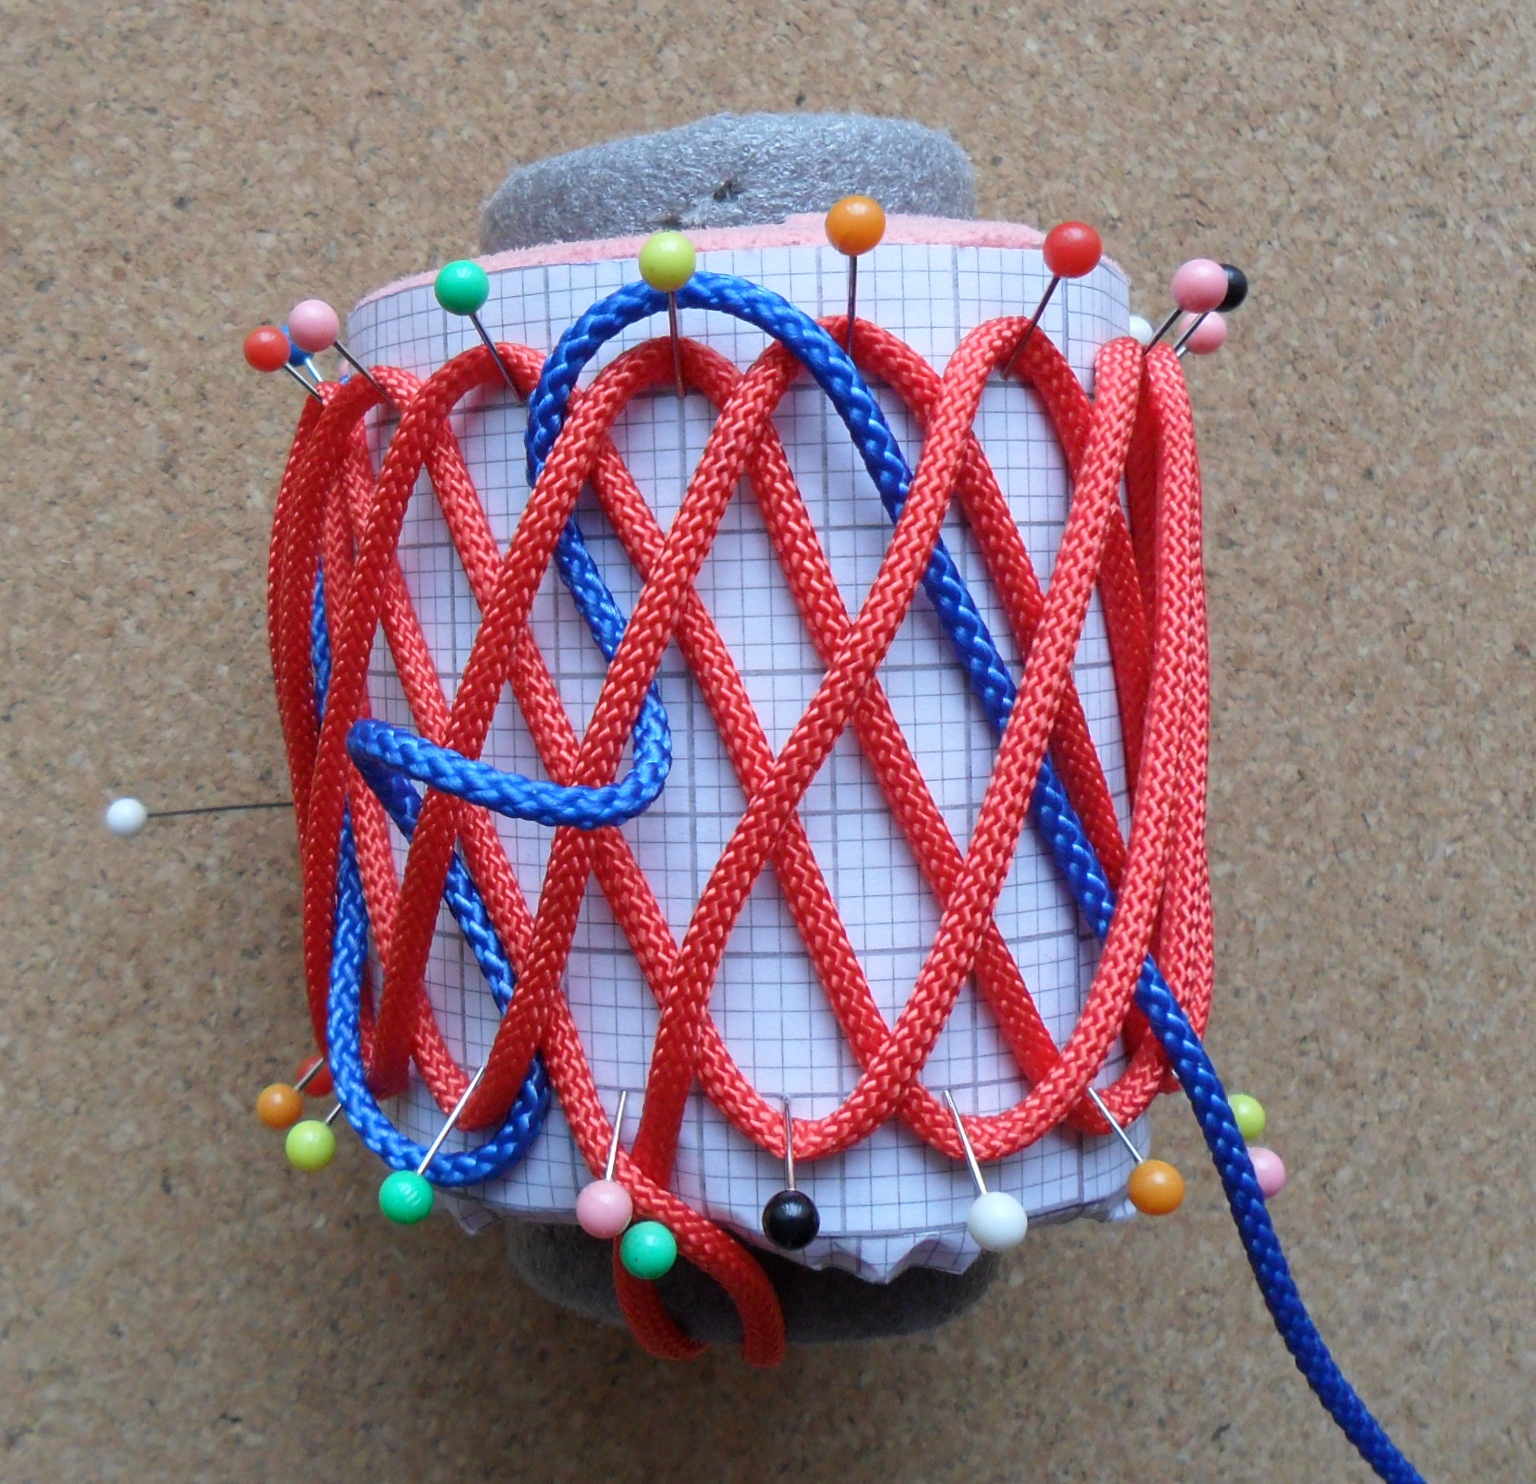
The knot can be made with any number of bights except multiples of 5. Here I'm using 17 bights. The pin rows are offset as for a Turks Head with an odd number of parts and I'm using red and blue 2.8mm. cord. Lay down a left hand lay (LHL) common grommet of 5 parts as shown.

Bring the blue cord down from outside the knot keeping it in the channel defined by 2 underlying red parts and come out at C1 (compartment 1) at the bottom. For the concept of compartments see my tutorial in KM149. I will start a mini cycle from this C1.

Go round the next pin to the right and under two upper diagonals. You will have gone over two upper diagonals then back under the same two.

Go over the same two and back under the same two again thus forming what I call an S-bend in the centre. Leave plenty of slack in the S-bend so as not to distort the red diagonals. Secure with a pin to keep it stable as shown . You will have come out at C1 at the top.

Go round the next pin to the right going over two upper red diagonals, down into C1 and down under all coming out at C1 at the bottom. This completes a mini cycle.

This shows the start of the next one.
Second mini cycle complete.

When working from the bottom to the top go back and forth working with the same two red diagonals only.

From the top, in at C1, under all and out atC1.

Here we have come round to another feature. When coming out at the bottom go over the blue bight. Think right hand lay(RHL).

I have not been pinning the S-bends to avoid ' pin clutter' but I would advise you to do so until you get used to tying this knot . They can be removed gradually as the S-bends start to 'link up'. Here , after the needle comes back under the two red diagonals, bring it up under the S-bend before proceeding.

Come out at C1 at the top and go under the blue bight. Think RHL.

This shows more clearly the centre ridge which is being formed.

Here we have come out at the bottom over the blue bight so go under the next blue bight on the right for RHL and proceed as before.

Here we have come up under an S-bend, over 2 reds, down under the next S-bend and back up to the top as shown. The centre bights are starting to link up now.

Same as before.

Almost there.

Here is the final tuck with the blue. The standing part can be seen emerging from the top. When going into C1 insert the needle to the RIGHT of the standing part and down under everything to come out at the bottom outside the knot.

Come out of the knot with the red ends as shown . That is the knot finished!! I have not shown every single mini cycle but I think I have covered all the crucial points. It will pay dividends to study the photos thoroughly before attempting to tie the knot. It is worth repeating that when looking at the finished knot and where the blue cord comes round the top pin at the top,
(1) go over blue and red and down into C1.
(2) go under all and up into C1 at the bottom
(3) go over red and blue.

Take the slack out of the red cord first . In order to keep control of the knot when the pins are removed I have pinned the occasional blue part at the centre.

This shows the red cord tightened after the bight pins had been removed.

Slack taken out of the blue cord.

After further reducing the knot, this shows the knot fully tightened on a 38mm. tube.

Another view.
I hope you find these instructions sufficient to enable you to tie this distinctive knot.