
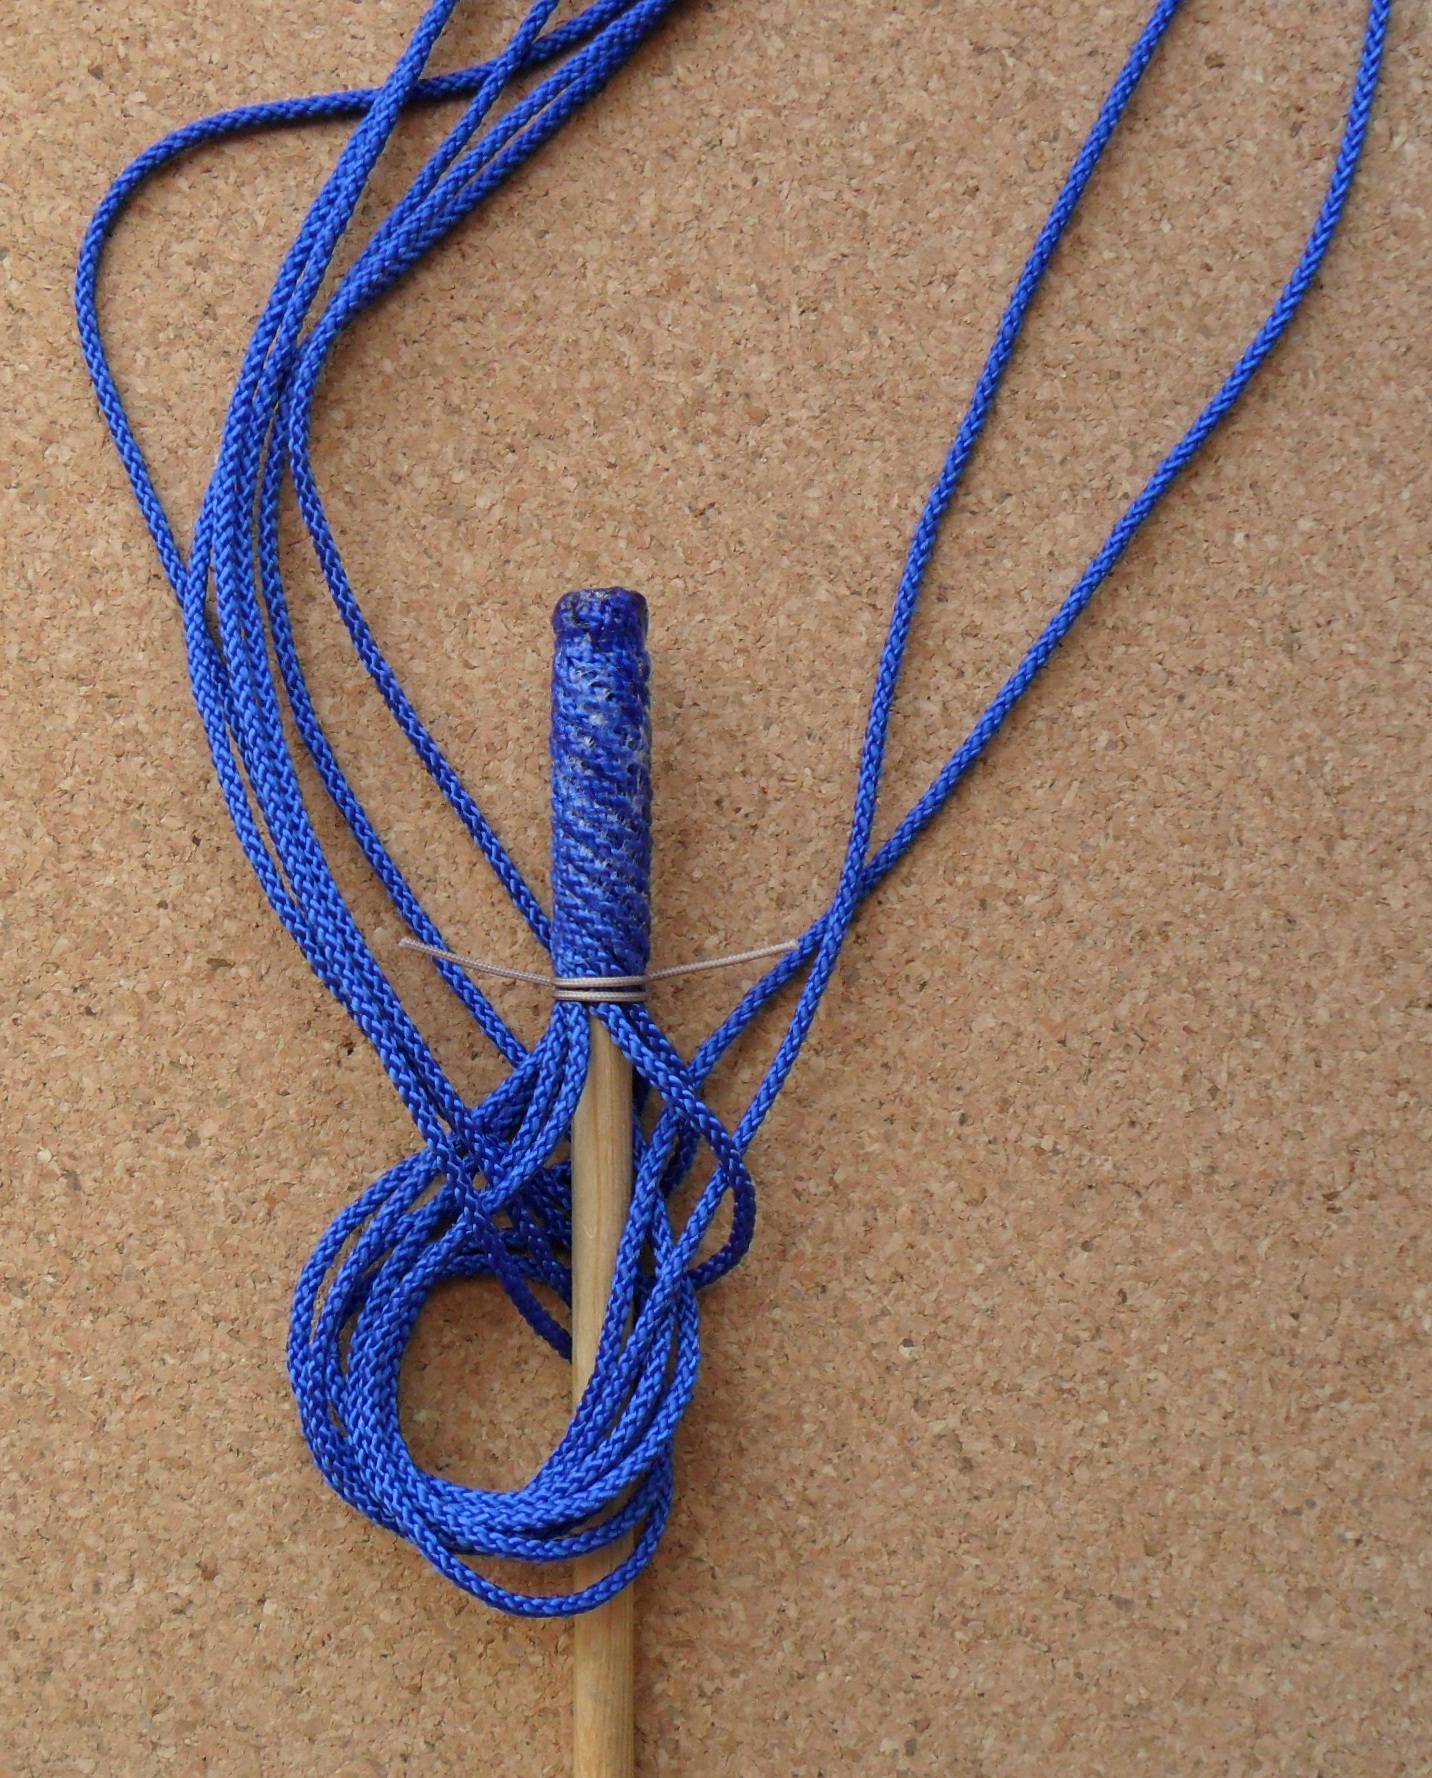
Here is a method for putting a handle on your spikes. As all my spikes already have handles , I will use here a short length of 6mm. dowelling. Just imagine it to be a nice metal spike!
I am using 8 strands of 2mm. cord. Each strand is about 2.5 feet long. Secure the strands at the top with a Constrictor , wind them down as shown (left hand lay) and secure with another Constrictor about 4cm. from the top of the spike.

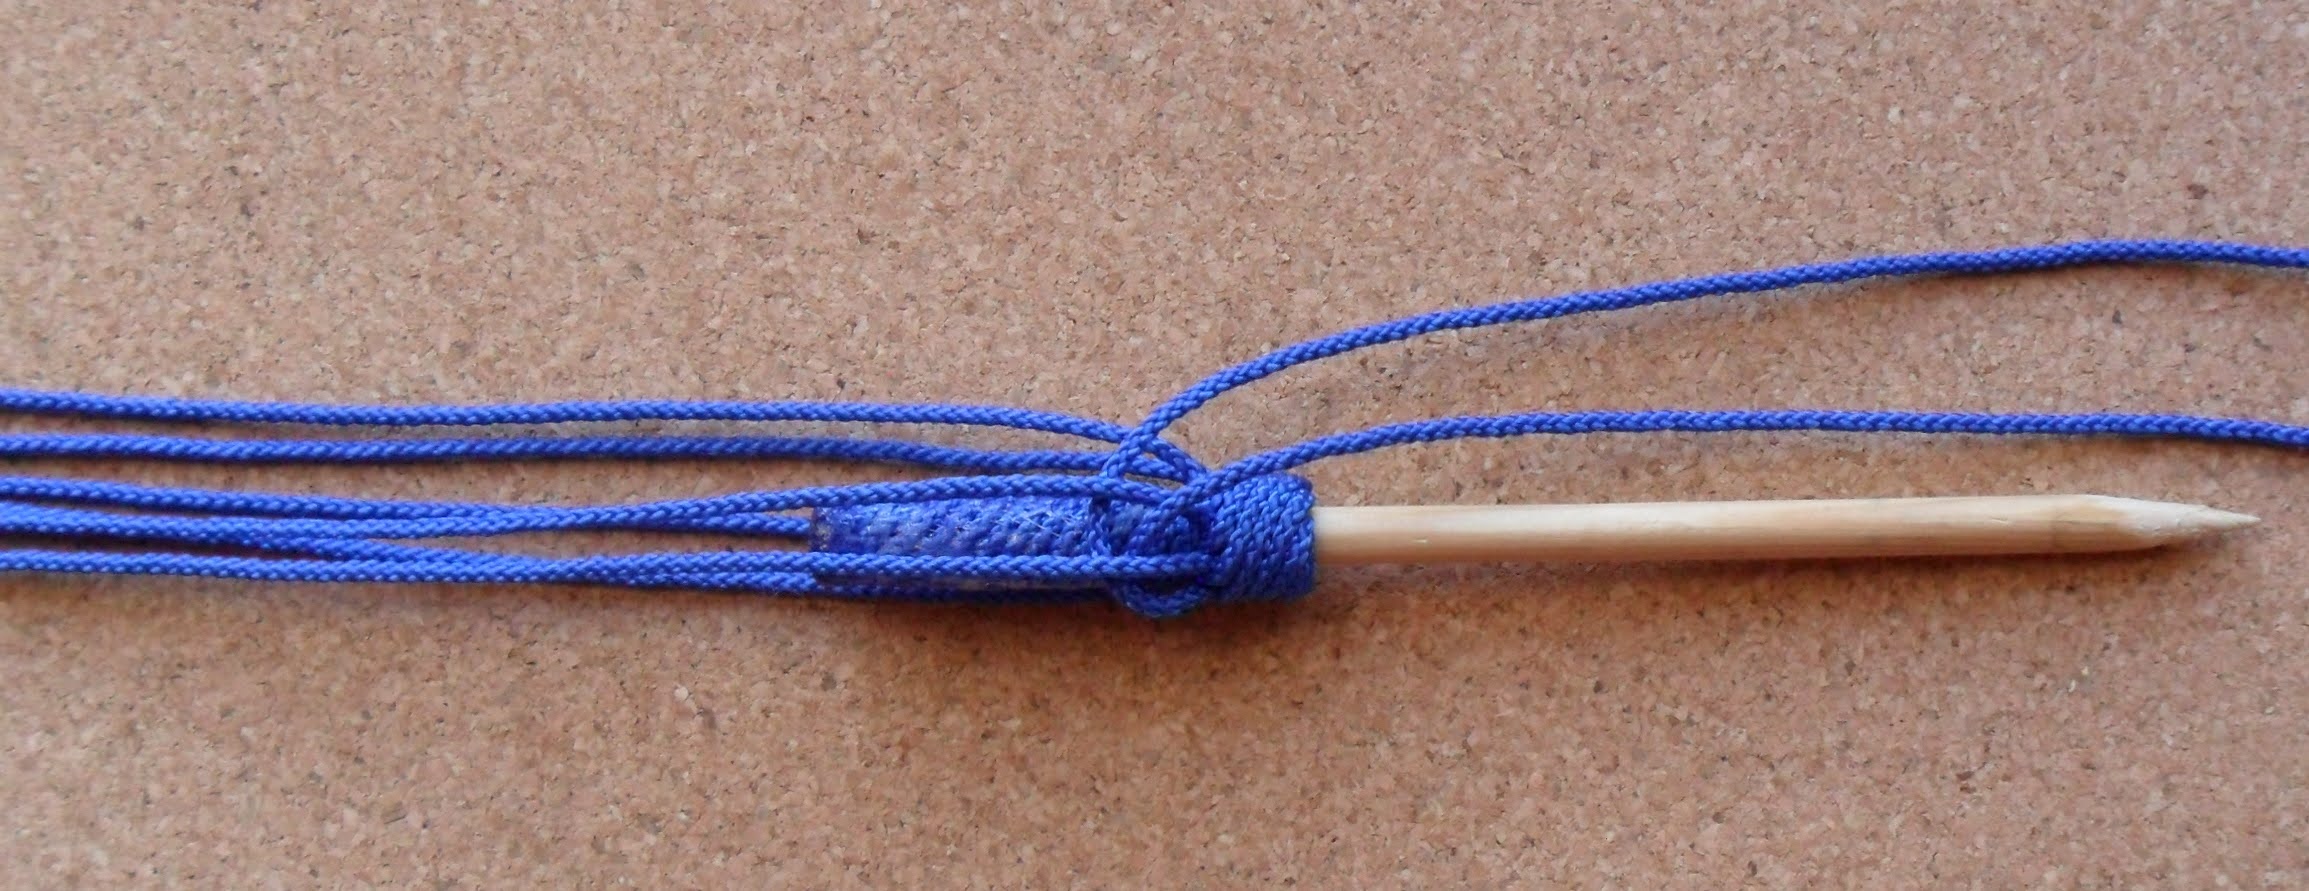
Slide the work up the handle slightly so that there is about 2mm.showing beyond the end of the spike. Melt the ends across the top or use a little glue to get the result shown here.

Do not use any glue that soaks through the cord in a capillary action. The glue shown here is the one I use almost invariably. Give the work a little twist to expose the underlying spike and apply a small amount of glue to the exposed section of spike. Do not get any glue on the cords below the lower Constrictor.

Twist the opposite way to tighten up again. Pull down any slack through the lower Constrictor. Try to keep the spiral tight with no gaps between the cords.Wrap a piece of paper around the work as shown, remove the top constrictor and apply a thin coat of glue to the spiral. Allow to dry thoroughly and then remove the paper. The cords below the constrictor should be completely free of glue.

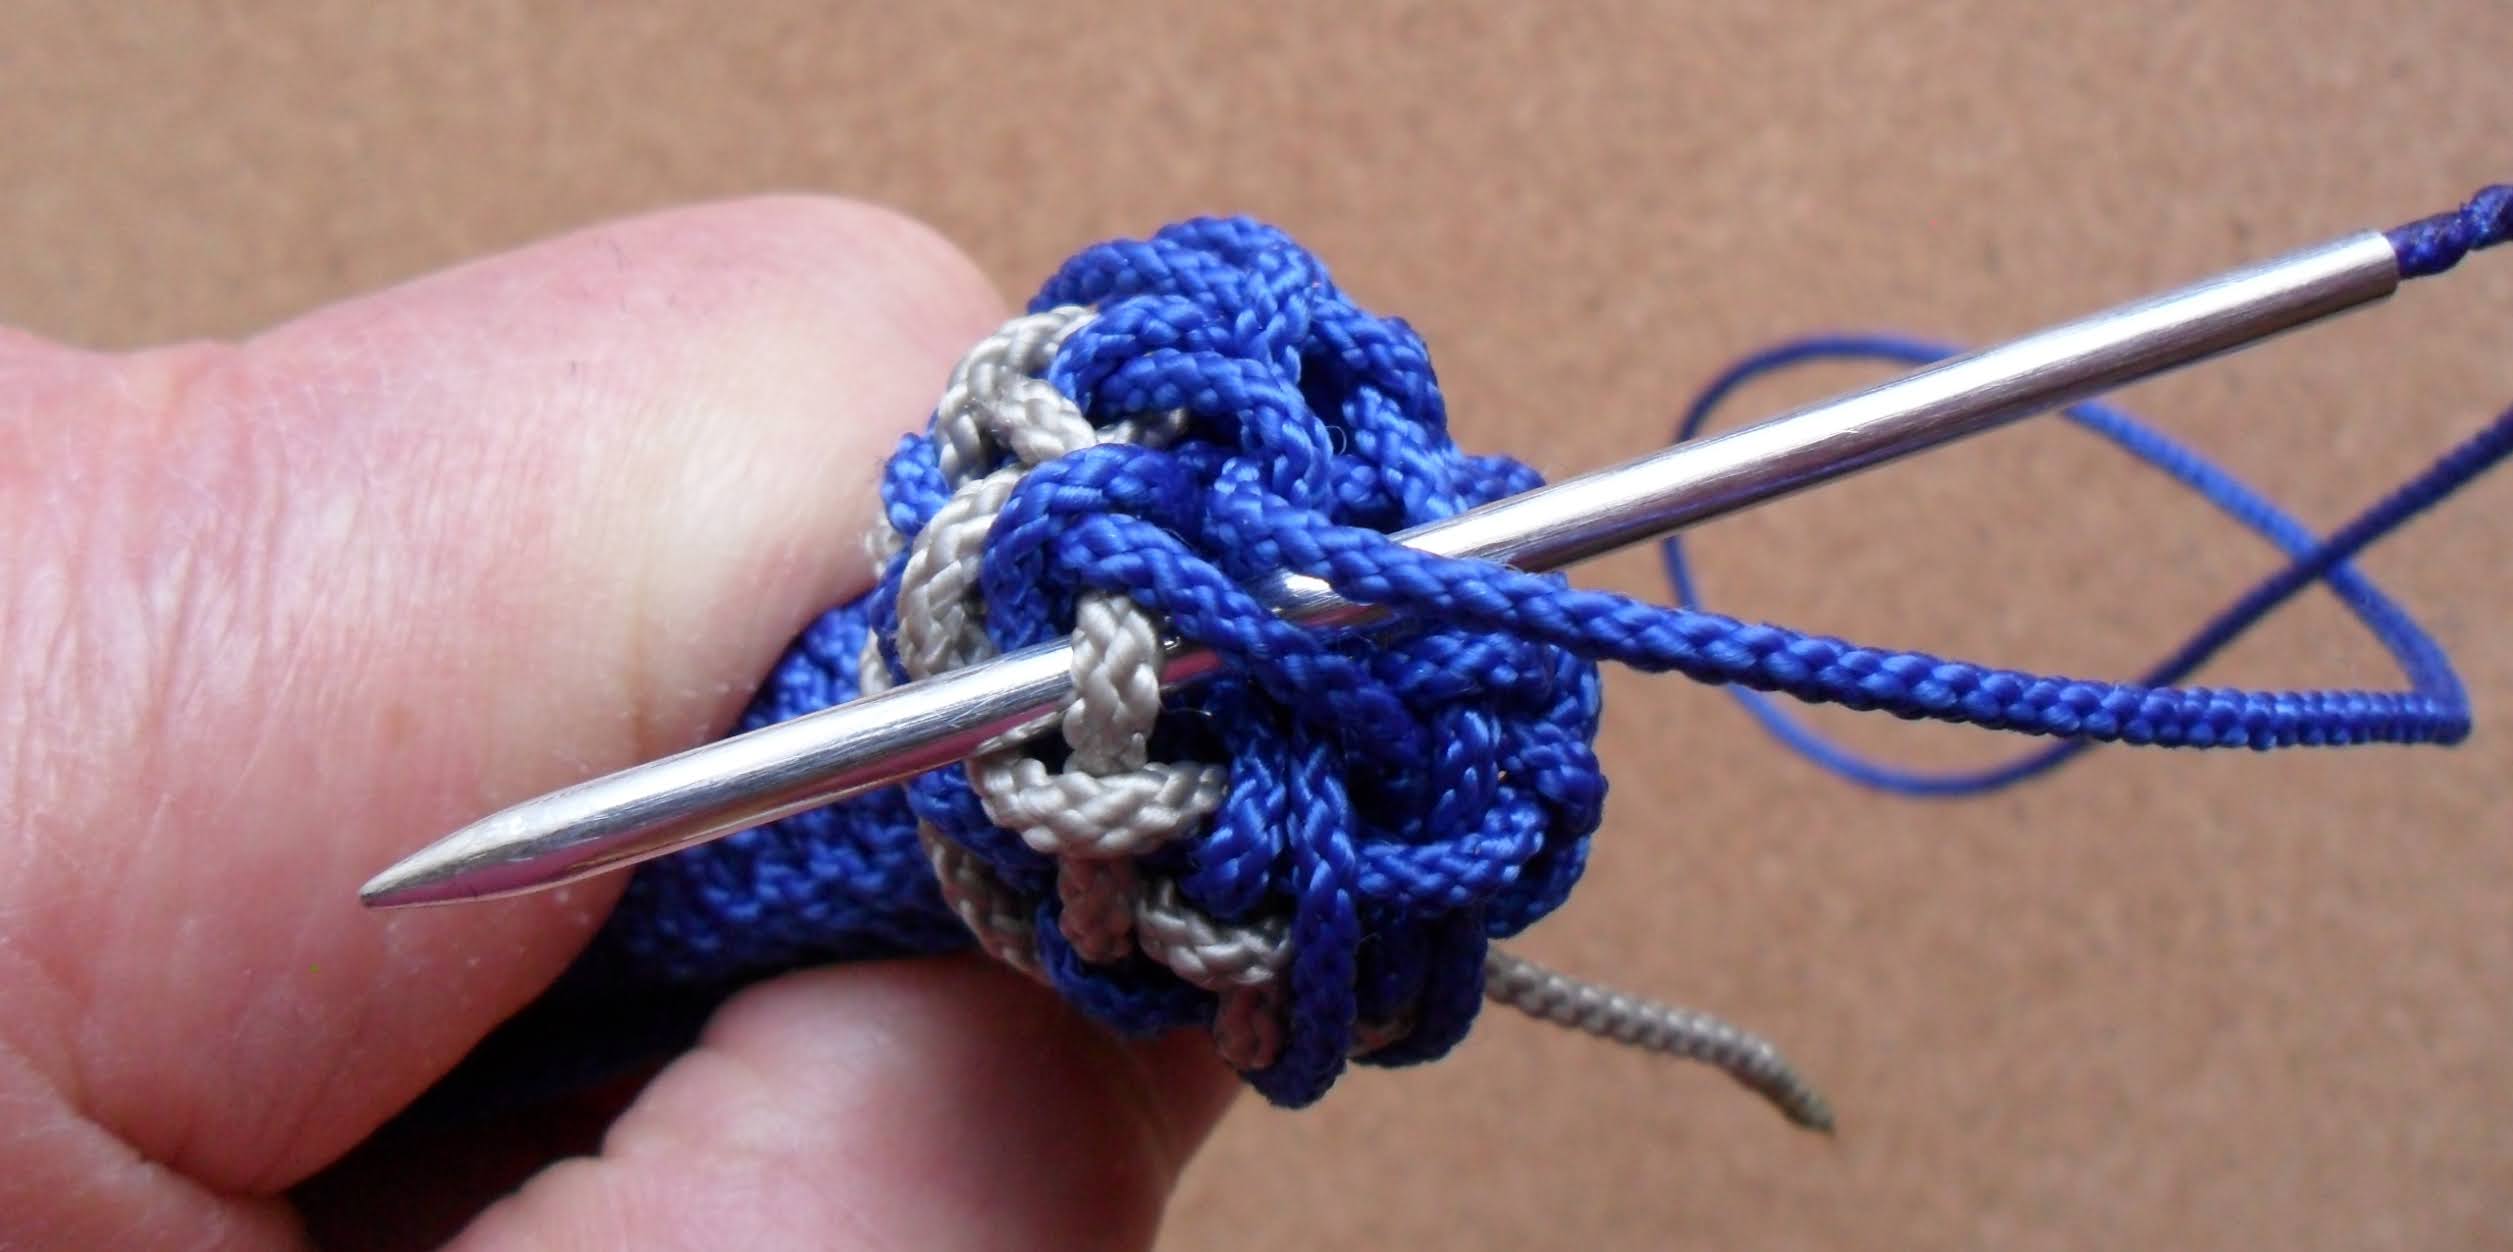
Make a full MW below the spiral. Tuck the first cord as shown.

Next cord tucked.
All cords tucked.

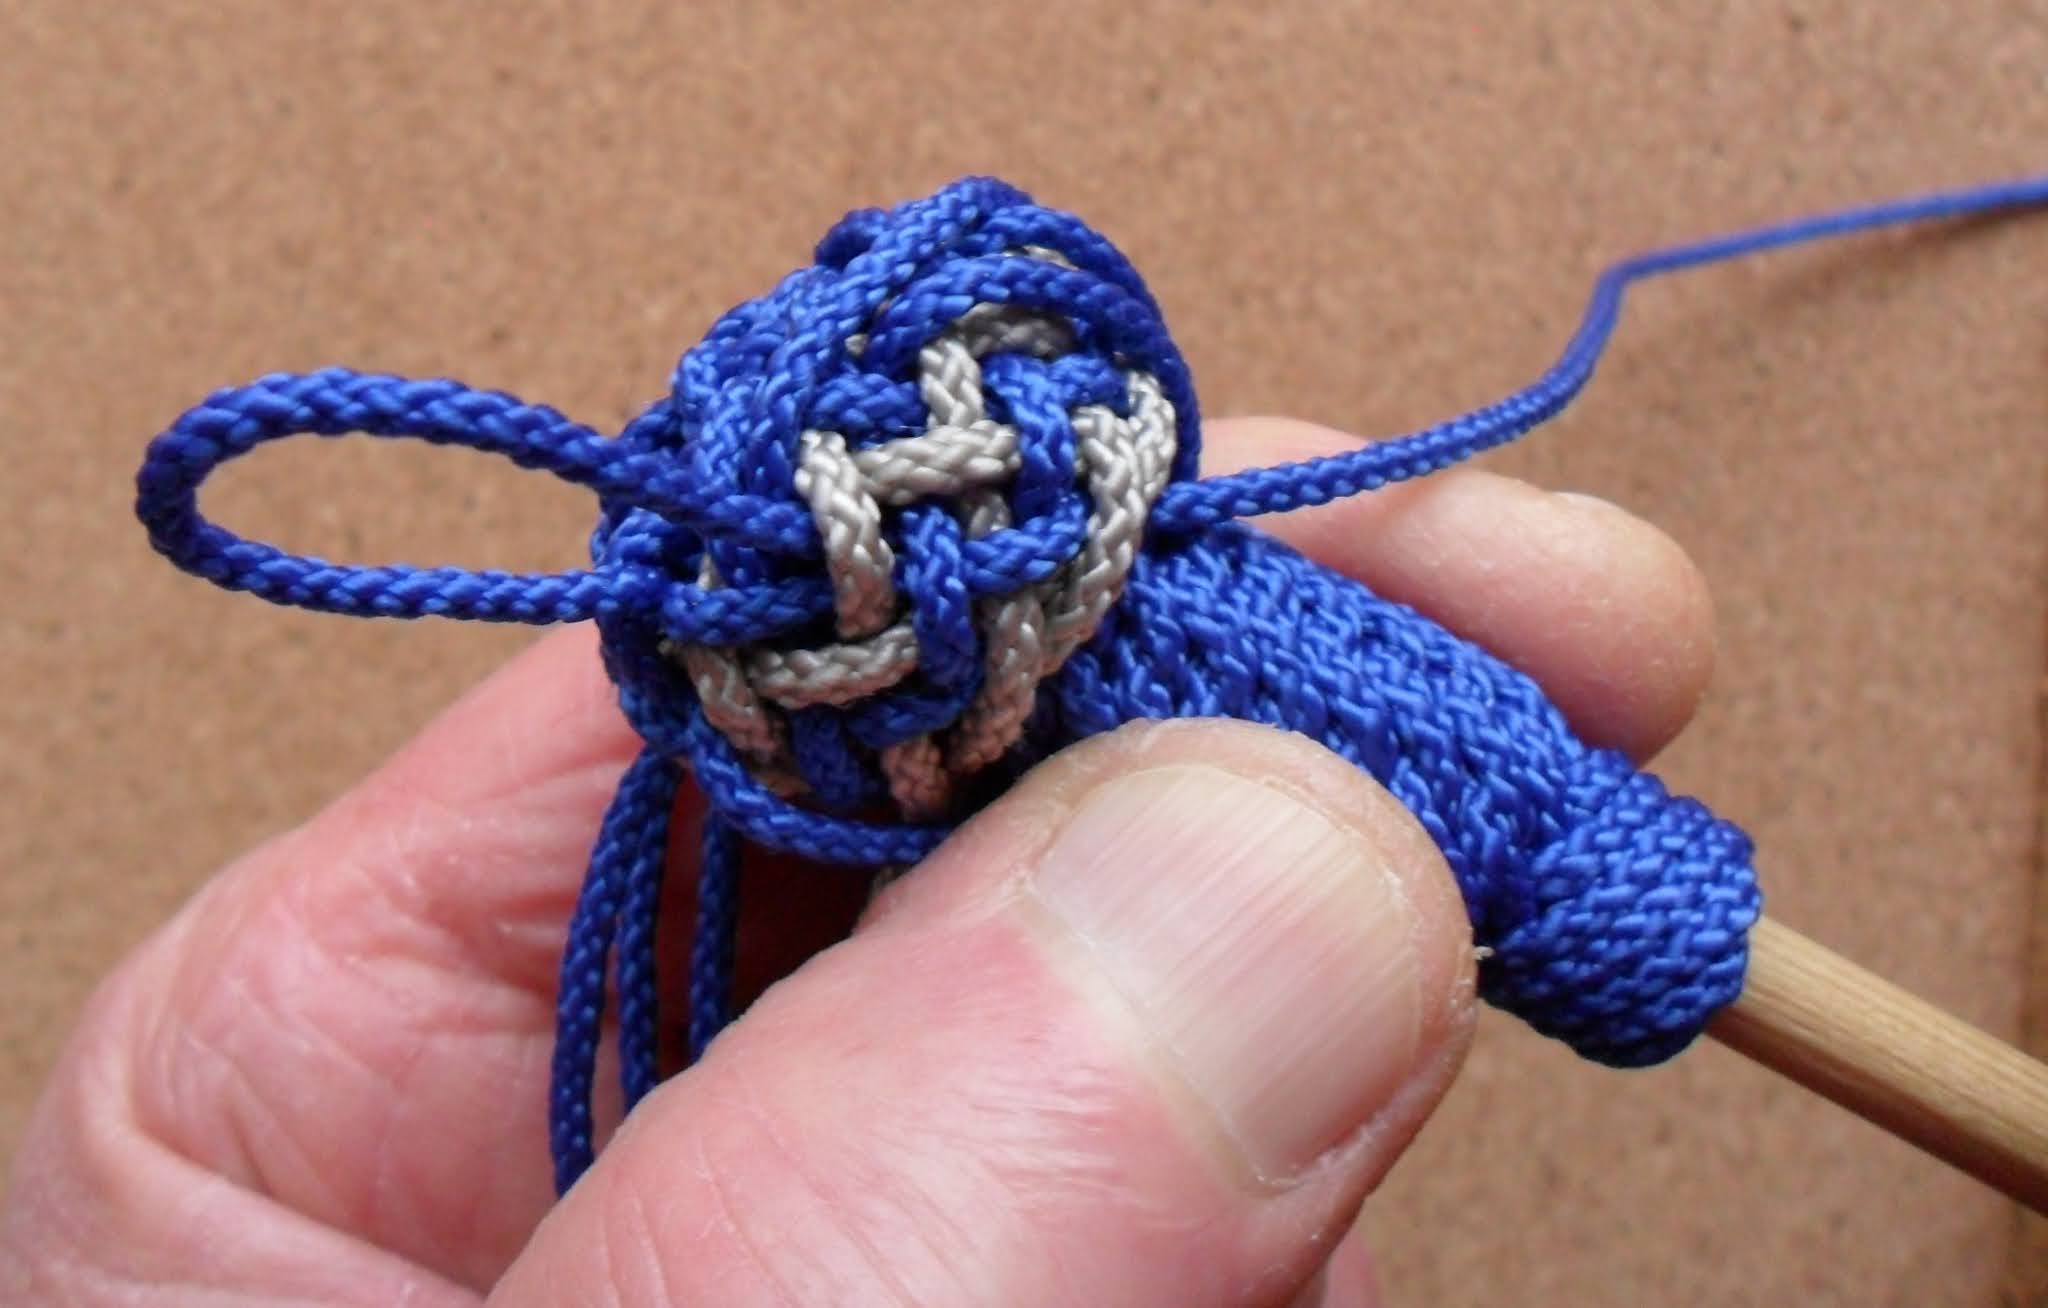
Take out the initial slack.

Remove a little slack at a time. No rush.

MW fully tightened.
Remove the Constrictor.
All the knotwork should be rock hard for a tool which will be handled often.
For the next section I am doing O2,U2 crowning to the right. You may wish to do something different.

Continuing with the crowning.

Crowning finished.
It can't be seen in the photo but the top of the spike protrudes above the final crown by about 2-3mm. This should give a nice rounded top to the LLK. Hopefully!! If you find that everything is level at the top you may create a protuberance by gluing a small button (round side uppermost) or something similar at the top. Removing a crown may leave too much sticking out at the top. Experiment!

Now make an U3 Wall Knot as shown.

U3 Wall Knot worked nice and tight.

I have wrapped a bit of sheet foam around the crowning
that can accept pins.Form a wall knot as shown.

Go over and under again.

Arrange as you see here with pins at the bights and the ends seized as close as you can to the top of the spike.

The Pineapple inlay will be done next with the grey cord. I am not giving a run list here. It is better in the long run if you understand how it is done should you wish to make a handle with more than 8 strands. Just study the next few photos. The start is shown here. In at C1, U1,O1 and under the cross formed by the standing part and the working end.

Rotated slightly.

Rotated slightly again.

Another view. With regard to the grey cord only and working from right to left, go over 2 parts at the bottom and under 2 parts on the way back up.

Inlay finished.

Remove the seizing and take some slack out of the work but not too much.

Form the crown shown here or you may prefer a smaller one.

Move the strands a little anticlockwise so that they lie as shown. The strand at the ten o'clock position shows this best.
Insert the needle down into the same space where the working end emerges and go under the grey bight and the blue part only as shown. If you have any difficulty you will have to work some slack into the grey interlay.

Tuck the remaining strands similarly. You may find that the crown has a much improved appearance when all strands are tucked.

Start doubling the crown. All strands will follow "below"or "outside" the original lead.At the last "under" go from "outside" to "inside". This is shown clearly in the photo. It gives a better lead and should become more apparent as you progress.
Now tuck down and out under all as shown. Do the remaining strands in the same way.

Give the crown a little tapping and this is how it should look.

Now tighten all strands. If you have a lot of slack I would recommend doing it twice. Initial slack first and then the final tightening. Try tightening the inlay cord first although I don't always do this myself . Do what works for you.

This shows the finished handle after the LLK has had a final light tapping on both top and side.
("My thanks to Pieter van de Griend for inventing the Little Lump Knot.")

This is the crown used for the LLK although you may wish to use a smaller 8-strand crown.
That is the end of the tutorial. I hope you enjoy it !!